Last issue I discussed the reasons that led me to take the plunge into building my own cat. I cleared my diary so I could concentrate on it full-time for 2 years, bought in some of the materials and components when I could get them at discount rates, and booked Matt, a local builder and artist, for 8 weeks’ work…
June – Getting started
Here we are at last, about to start building my Kurt Hughes fast cruising catamaran. It will be 32ft long, which is 2ft longer than my workshop, so I have added a 10ft x 16ft extension to get it all in. The workshop is a disused farm building in rural Devon, an old poultry shed that I have converted. There is a rack for the plywood and other pieces of wood, benches against one wall, a bandsaw, table saw and planer. Lots of tools and junk. And not much space for a boat hull. We’ll have to cut around the door to get it out, but the kind farmer has agreed we can use a corner of the field next door when it comes to putting the boat together. We’ll think about that when we get to it. All I want to do is start, because it is already mid-June and the summer is passing quickly. The plan is to get the two hull shells done before the autumn, then do smaller jobs during the cold winter months. The construction manual and video that came with the plans showed lots of enthusiastic Americans slapping on epoxy and getting their enormous boats into shape in a matter of months. So this shouldn’t be a problem, I think (naively)…
First we have to make a hotbox. This is 10ft wide, 6ft high and 3ft deep and will contain all the glass cloth and balsa before it is used, to minimise its humidity. I put two 100W lightbulbs low down and a dehumidifier inside. With the boxes of endgrain balsa and racks of glass there is hardly any room. It is all well insulated and should do the job.
Scarfing the panels and vacuum bagging
Next comes the preparation of the plywood for the hull panels. The idea with this type of construction is to laminate 2 thicknesses of 3mm ply over a simple curved mould to form one hull side. First they need to be scarfed 12:1 together into 6 ft wide sheets, then scarfed end to end as they are laid up on the mould.
Suddenly the designer’s blithe suggestions start to seem a bit unrealistic, something I am to discover over the next few weeks. Matt and I place all the ply sheets together to plane and sand the scarfs 12:1, which goes well for one side. You can check your progress by the width of the exposed plies. The manual then says to clamp them together and “just flip them over”. We can’t lift 30 sheets of plywood in one go, never mind turn them over. As for flipping….are these Yanks superhuman?! We move everything one sheet at a time, get the scarfs done and join the sheets of ply using a vacuum bag. This method sounds daunting but is really very simple. I used a roll of medium polythene for the bag, some bubble wrap to ensure the air can be sucked from all corners, and glaziers’ Flexistrip bedding compound to seal it all up. The extraction pipe was 20mm polythene overflow pipe drilled with 6mm holes connected to ¾” reinforced hosepipe leading back to the vacuum pump. This is an old pump from a university geography dept. and seems to work well, although it spews out an oil mist. We hurriedly make a vent pipe from flexible ducting. In practice the partial vacuum allows air pressure to clamp the sheets of ply together evenly and firmly right across their width, something impossible to do with metal clamps. It works well. We are on our way.
To make the hull panels requires the now 6ft x 8ft sheets to be laid up in two layers on a simple curved mould, and vacuum-bagged together. Matt and I slosh epoxy onto the surfaces of the ply and manoeuvre them gingerly into position. We have prepared the bag beforehand, so it all goes quite well. The scarfs line up reasonably well on the mould, and the bottoms of the panels are held into the curve by a strip of wood running along the base of the mould. Chuck on the bubble wrap, secure the pipe,
flip the plastic over the top, seal around the edges and start the pump. The mould takes up most of the space in the workshop, and suddenly we get our first impression of how big this thing is going to be.
There is a saying about boats always looking small in the water but big on land. In a workshop I can tell you they look positively vast.
July – A penny drops
Suddenly a realisation dawns. There is no way we can build an entire hull inside the workshop. By the time we get the sides together, there won’t be room to squeeze past, and we can’t use the machines without some space. Luck is in. The farmer lets us use the cowshed across the yard. It has raised stalls on either side of a 6ft central aisle. The curve of the metal stalls is ideal for storing the hull panels. The downside is that the shed has not been mucked out, probably for years, and it is fragrant to say the least.
But the cowshed has plenty of space and convenient metal roof trusses to support the floppy hull until it gets the bulkheads. We clear the central section and put down some plastic sheeting, but leave the stalls with their dry straw and cow muck.
Into the cowshed
Now we are using the cowshed, there is space to move, and we make progress. I have been preparing weekly action sheets to focus our minds on the tasks to be done, but it is clear that I am wildly overestimating what we can achieve. Each week I depressingly have to reschedule, even though I think I have been generous in the amount of time allotted to each job. It is becoming clear as July passes swiftly that this boat is not going to be built in the sort of timescale suggested by the designer. Getting the two hulls together by the end of the summer starts to look increasingly unrealistic. My frustration is fuelled by the fact that I am paying Matt for his work, and need a second pair of hands to do these big jobs. Things like fitting out can be done alone, but getting the hull panels together needs the two of us. The budget for labour will just have to grow.
This method of boatbuilding is a giant stitch-and-glue project, like building a Mirror only much bigger. It depends on cutting out the hull panels accurately. We make up a huge paper pattern, using scrounged reject rolls of high quality technical drawing paper. The pattern is lofted from the plans on the floor of the local village hall (how convenient vinyl floor tiles can be for rough measurements!), cut out, then the outline is spray-painted onto the four curved panels. Matt cuts these out with a portable circular saw set very shallow and we plane and sand them to shape, with the appropriate bevels. After gluing on the spruce sheer timbers we drill 3mm holes at 50mm intervals 20mm in from the curved bottom edge, and then stitch the panels together with copper wire, twisted together.
Now we lift the wobbly panels into a vertical position and gradually pull them apart. The idea is to spread them until the angle at the keel is just right. We get them to this distance, and hold the sheers with sticks and clamps, but the keel looks terrible. There is a lot of compression at the keel because we are essentially forcing the panels into a compound curve, and it all seems to be bumpy and lumpy, not at all like what the heroic Americans were doing on the video. We try to knock out the bumps with a stick, but banging it in one place just makes the bumps worse in another. It is a hopeless task, so we stop for a cup of tea and a think.
We realise that the copper wire is too thin; I misinterpreted the numbers, easily done on this because the drawings are a mixture of metric and imperial, with American gallons, cups and wire gauge…Copper is used for two reasons: 1. because it can be ground away easily, and 2. because it stretches. Our thin wire is stretching too easily and not controlling the keel pressure. We put the panels down on the ground again and take out all 200 stitches. Next day we replace them with much beefier 2.5mm copper from old power circuit wiring. Now we are in business, and get the keel looking straight and true with just a little bump in the middle.
Bogging the keel …and disaster
We use a yoghurt pot and a spatula on long sticks to place some epoxy ‘bog’ along the keel. This is made up using microballoons, colloidal silica and chopped glass fibres. It covers the keel up to the wires, and fixes it in place so we can get inside next day for the keel timbers.
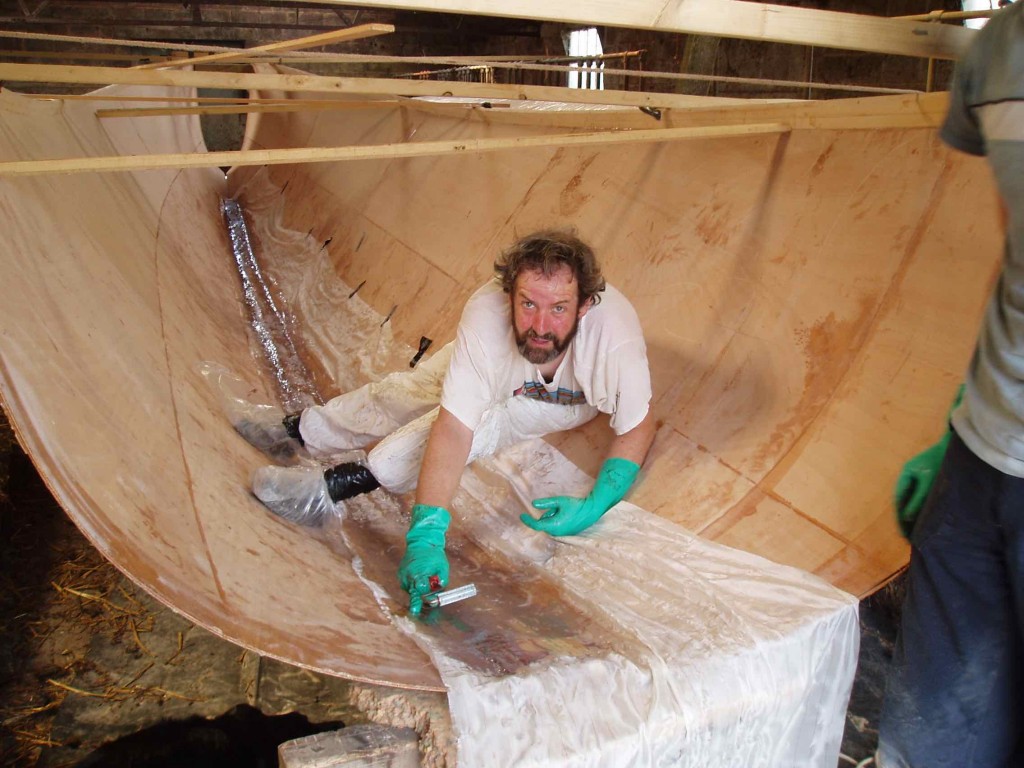
Placing the keel timbers was our first major disaster. We follow the instructions closely, but our lack of experience with epoxy lets us down. The idea is to spread epoxy bog in the keel, place 4 x 1 timbers on top, wire them down to pull them into the mix, cover this with more bog, then place two pieces of biaxial cloth on top. Sounds easy, like most of the designer’s instructions. Looks easy on the video. In practice the thick bog starts to overheat before we can get the keel timbers in properly. They don’t bed down as they should. Of course we should have stopped as soon as things started to go wrong, but Matt was inside the boat and I was frantically mixing quantities of bog thinking that we could get it done if we worked quickly enough, so we just didn’t have time to stop and think. The instructions called for the biaxial glass to be wetted out on a piece of plastic before the bog even went into the hull, and in the general pandemonium even this went off before we could do anything with it. It was like a 32 foot noodle! Eventually we got the keel looking vaguely like it should, and just had to leave it. I was utterly miserable that I might have compromised such a long and expensive project so early, and even contemplated starting again. And Matt’s trousers were ruined!
What we had done wrong was to use slow hardener when we should have used extra slow, which would have allowed more time for us to get it all pulled down properly. And we should have done it a little at a time, not all at once. The summer was hot and we didn’t take that into account. In fact the next day things didn’t look half so bad. A bit of grinding and some more bog applied to the sides sorted it out. The biaxial went on neatly after that. The designer’s method for this is quite smart. The cloth is placed on polythene and wetted out, then the poly is cut around the edge of the glass and the whole shebang, poly-and-glass, is lifted into the hull. It is flipped over (this time even us feeble Brits could manage the flip) and placed onto its marks. Peel off the poly and bingo! Doing it any other way would make it likely that the biaxial would stretch and not fit where it was supposed to. We have used this method on lots of other areas, and it works a treat.
Folding up the hull
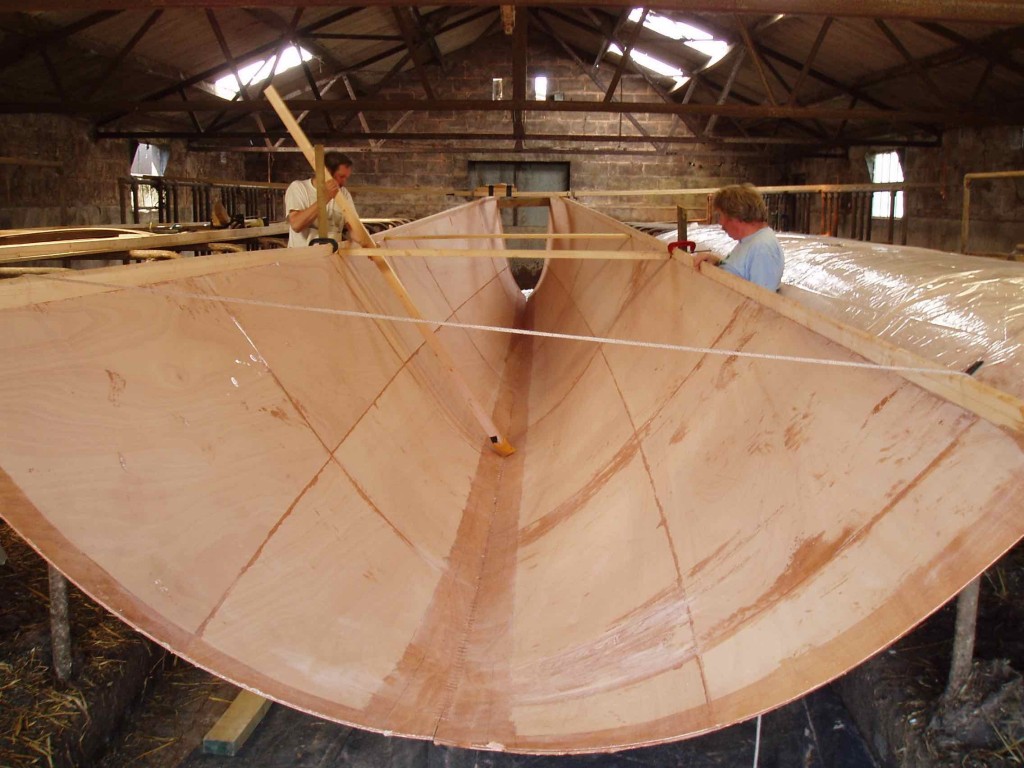
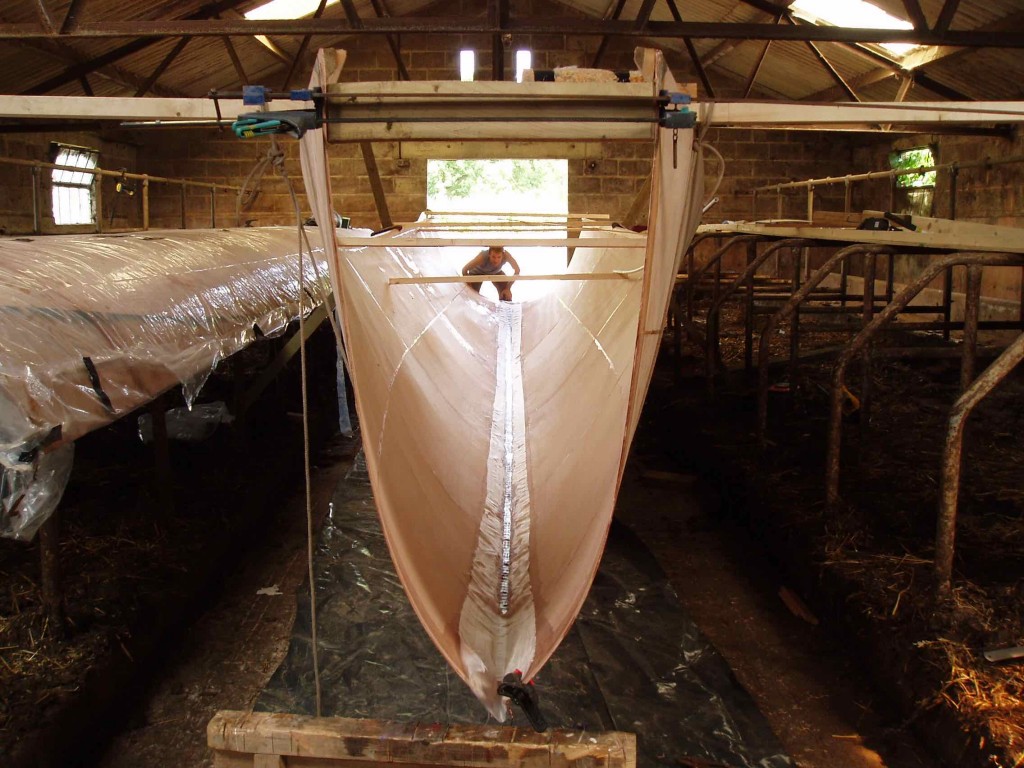
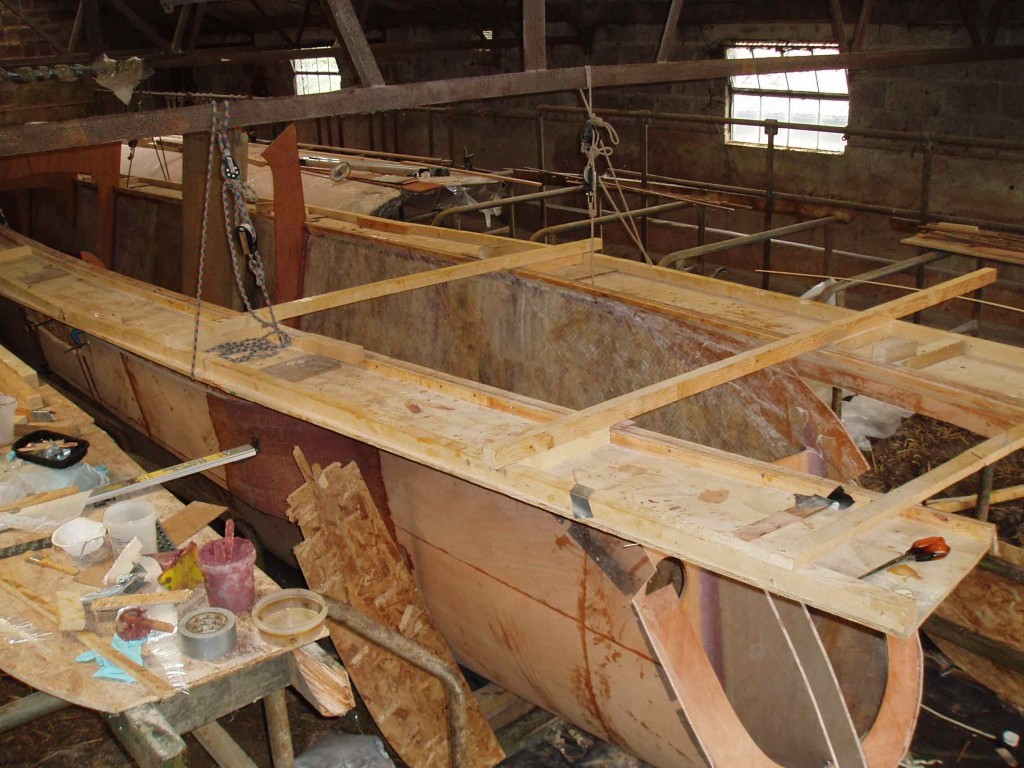
Once the keel is sorted out, the hull sides are brought up into their final position, where they are held by wooden flanges that fix the shape of the sheers. The flanges are heavy ply and 2 x 2 timber, and I am very wary of them breaking loose and damaging the flimsy 6mm hull sides. We hit on a seamanlike solution using ropes and blocks to suspend the flanges from the roof trusses, clamp the sheers to them, and gradually pull the two sides together. The plywood compounds into the shape required without much complaining, and we fix timbers across to hold the sheers at the correct spacing. It takes the whole day to pull the hull together, but by the end we are looking at a nicely shaped smooth hull, with just a bulge at the open forefoot.
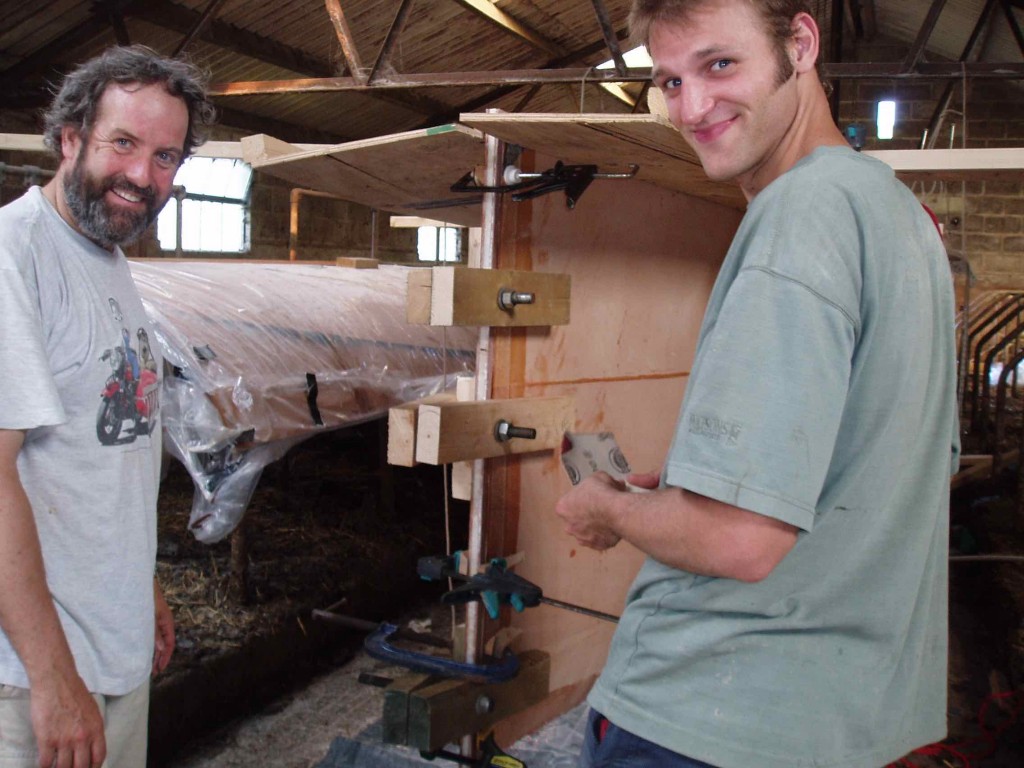
The next day we pull the forefoot together very carefully and slowly. The difficulty here is that if you drill holes through the sides and fix bolts to wind them together they tend to bind as the angle changes. We made some simple wood clamps from 4 x 2 and threaded rod, so the ply could slip past the jaws. It eases up into a straight shape around the rigid ply-and-foam stem unit, and we glue it in place before anything lets go. I get inside the boat to complete the front end of the keel glassing and fix the stem from inside. It’s very uncompromising, completely plumb, and I am not totally sure about the shape. This worry nags at me over the following week, as we install the balsa lining and start to glue in the bulkheads.
Eventually I read an account of a near-pitchpole in the Atlantic written by Richard Woods. His conclusion is that bows which do not have overhang and flare to increase buoyancy substantially as they are pressed down can be dangerous offshore. That is the decider; I have to do something or I will regret it for as long as I own the boat.
Chop and change
The next weekend I take the jigsaw and chop out all three forward bulkheads. Amazing how quick it can be to undo hours of precious work! I then slice down through the foam of the stem unit nearly to the base and pull the topsides outwards. It expands by 80mm at deck level quite easily, so I fashion some ply and foam and glue it permanently in place. Now we got flare!
I fit new bulkheads and it all looks much more like something I can live with. Suddenly this is looking like one serious boat, sleek and narrow, potentially fast but with all the room I could wish for inside. Because of the design changes, I lay out the position of the bulkheads on a long stick down the middle of the hull. This is set aside for the second hull, so we can get all the bulkheads in exactly the right position. It is somehow more secure than taking measurements off a plan.
Getting rid of the stringers
The balsa is another modification to the plans, done in order to avoid stringers inside the hulls. We use ½” endgrain contour balsa to line the hulls aft of the watertight compartment, and cover this with 4 layers of 250gsm unidirectional, 2 layers fore-and-aft, 2 layers diagonally right across the boat. The glass is a nightmare for 3 of us to put on, using over 35kg of epoxy, but the finished article looks strong and rigid. I get the chance to test it when we cut the hull side and pull an underwing flare out by 200mm. It’s a good combination, unusual perhaps in having the glass on the inside, but we keep the advantage of the smooth ply for finishing the outside of the hulls, and that is coated and glassed for protection anyway.
The summer draws on. We have only done one hull! Most of August is written off with holidays. Whatever happened to the plan to get both of the hulls done by the end of the summer? Are Americans really superhuman? Of course, all the changes to the standard plans have added a lot of time to the job, and lack of experience has led us into some mistakes. At least we should get the second one done much quicker….
