After building the polytunnel Cathedral and getting the shell of the second hull completed by Christmas, it was time to take stock of progress. Things had not turned out quite as expected, especially the timescale. Oh, and the budget…
The early months of 2006 were cold and wet in Devon, simply too cold to do much with epoxy because it thickens to the consistency of honey below about 10 degrees C and takes an age to go off. I sealed off a small area of the workshop and warmed it up to an acceptable temperature so I could flocoat panels. Unfortunately this meant that hundreds of tiny flies hatched and dive-bombed the wet epoxy!
The original plan had me constructing the rudders and daggerboards over the winter, but matters beyond my control took a hand. At the end of January I attended a meeting of the Exe Estuary Users’ Association to discuss the proposed new harbour authority, and after that joined a working party to try to get a better deal for the boat owners. It seemed a reasonable thing to do, because if I didn’t have a mooring to put the boat on it would be a poor show after a couple of years of building. Little did I know that this was going to occupy me on and off for the next 9 months. So rudders and daggers would have to wait. To keep pace with the build, this issue I am taking a break to look at some techniques and lessons learnt.
Learning lessons in epoxy
During our early building I joked that we would end up by making every mistake in the book. Looking back it does seem like we have done just that. I learnt lessons the hard way in:
- not mixing epoxy in too big a quantity/ using slower hardener. We generally use the slow hardener if possible, just because it gives longer working time.
- checking for amine blush and washing/wiping down where necessary
- keeping an eye on temperature so the epoxy remains workable. There was one evening when the temperature was dropping fast and I was rolling on layers of epoxy. It got progressively slower and harder to apply. Because I was alone there was not much I could do to alter the circumstances.
- remembering to add the hardener! This one seems so blindingly obvious, but if someone starts talking to you just as you are putting the epoxy into the pot it is hard to keep track. We now count the number of pump strokes out loud every time, and generally use 5 or 10 so the mixes are in round numbers.
- ensuring that the glass cloth is fully wetted out. Our preferred method is now to put the cloth on a piece of scrap polythene, wet out the top surface, turn it over and wet out the other side. It is then left for a minute or two before being placed in position while still on the polythene.
- thinking it right through before starting a glue-up operation. It is so easy just to launch into gluing something only to find that you should have set up a trestle beforehand, or rubbed down the bit at the corner or have laid out the glass. We now approach every task with care to ensure it goes as smoothly as possible.
- allowing enough time for a glue-up. It can take hours to prepare all the glass, and it is no good starting a major operation at 3pm. We made a rule not to begin a big glue job after 11am. We even achieved it once!
- doing one operation at a time. Although the designer makes much of working ‘quick and dirty’ we have found that a systematic approach means everything gets done properly and nothing is rushed.
- using peel ply. This treated nylon cloth is placed over the lay-up and helps to consolidate the matrix and smoothe out the edges. It is very useful because it also provides a good surface for subsequent bonding. We have made use of once-used peel ply, which gets a little stiffer, to flatten out areas that have been filled with bog.
Epoxy has a reputation for being tricky to use, and it will certainly let you know when things are not going well. But observing all the above points carefully will minimise the risk of disaster. I know, I’ve been there!
One little tip is to keep a minor filletting job on the go to use up any leftovers from a big mix. It can be surprising how much gets thrown away in the bottom of the mixing pot.
Other techniques
There are a number of other techniques and tips that we have found are very handy and are worth sharing. First is 36 grit sandpaper. The designer calls for it, so I bought some at the local secondhand tool shop, where they had a roll of 3M 60mm cloth-backed material. Having built cabinets and delicate boxes in the past, at first I regarded the stuff with horror. It looks as if it will tear wood to pieces. But it has become our favourite tool, stuck on a piece of 9mm ply or just used loose. It can take material off nearly as quick as a grinder with less dust and more control. It is ideal for roughing up epoxy for bonding (although we also use 60 grit to take down any shininess). Altogether the best £15 I have spent.
Vacuum bagging
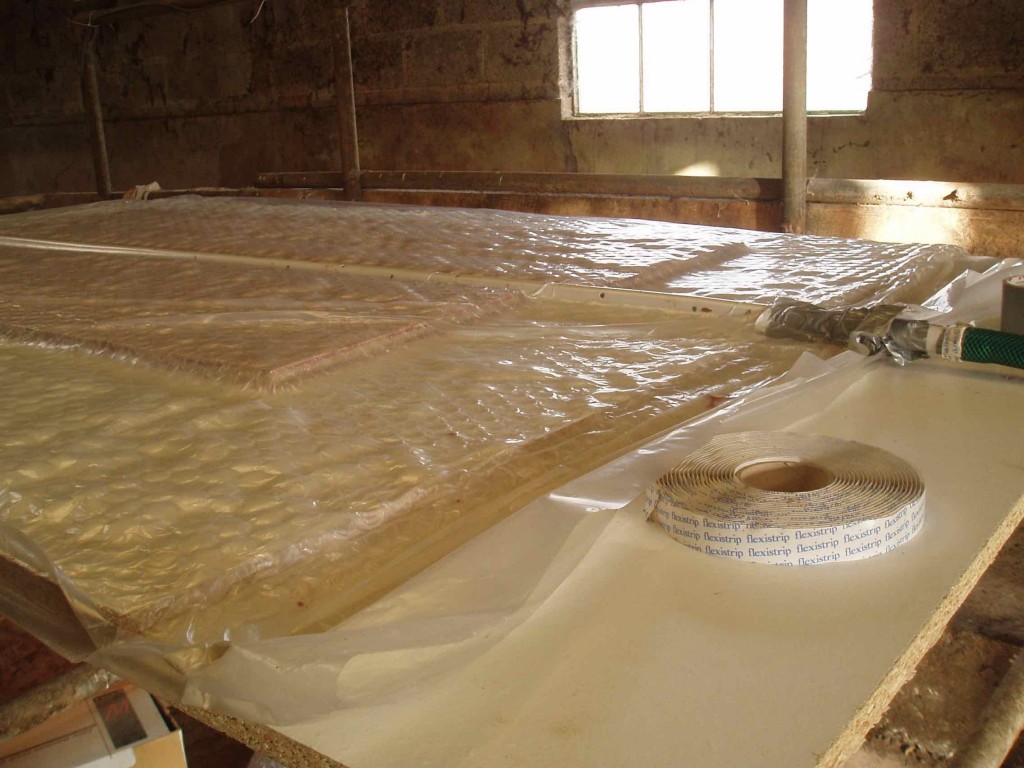
Vacuum bagging has become a frequent technique. When we were doing the very big hull bags it was a rush to get everything in and sealed up in time, but smaller bagging operations are quite relaxed. I use glaziers’ Flexistrip butyl tape from the builders’ merchants to seal around the edges. This may sound wasteful of resources, but the current plastic bag has been used 4 times already and may do some more. I use melamine-faced chipboard as the work-surface to bag onto. This works particularly well as it needs very little in the form of waxing. I try not to use wax when I am doing a ply/foam/ply panel as it may transfer onto the ply and prevent the epoxy from soaking in to the surface later. One can either place the bag all round the chipboard and workpieces or stick the Flexistrip onto the board for smaller items. It is important to ensure that air is evacuated from underneath the pieces, so there is a limit to their size before you need to drill small holes in the surface.
Our vacuum pump is still going strong, although it spews out oil for a pastime. I acquired another little pump, but it is easily overcome by the inevitable leaks in the system, so is of limited use. Reinforced garden hose and plumbers’ overflow piping provide the connection. 6mm holes are drilled in the pipe to go inside the bag, and tape on some holes outside the bag controls the level of suction. Bubble wrap, with the bubbles upwards, goes under the pipe for ply lay-ups. If you are vacuum bagging glass and foam it is important to use dressmakers’ batting so there is even pressure on the glass. I got an interesting dimpled surface when I used bubble wrap! See the Farrier website for an excellent 2 page download on vacuum bagging with glass.
Little tip no 2: I was using up brushes at an alarming rate, until we changed to using scraps of foam pipe lagging. These have just enough softness to be able to coat an edge or wet out a surface, and get disposed of during the process. The problem with the brushes was that we forgot to clean them during the glue-up, and would invariably waste more than we should. The pipe lagging can also do duty as a mini roller.
Scarfing plywood
This is one of those jobs where things actually work in your favour. By marking up the scarfs accurately and laying the ply pieces on top of each other right on the edge of the workbench it is possible to cut scarfs quickly with a power plane and block plane. The plies of the wood indicate where a little more needs to be taken off, and the resulting scarf is as strong as the original sheets itself.
Joggle sticks
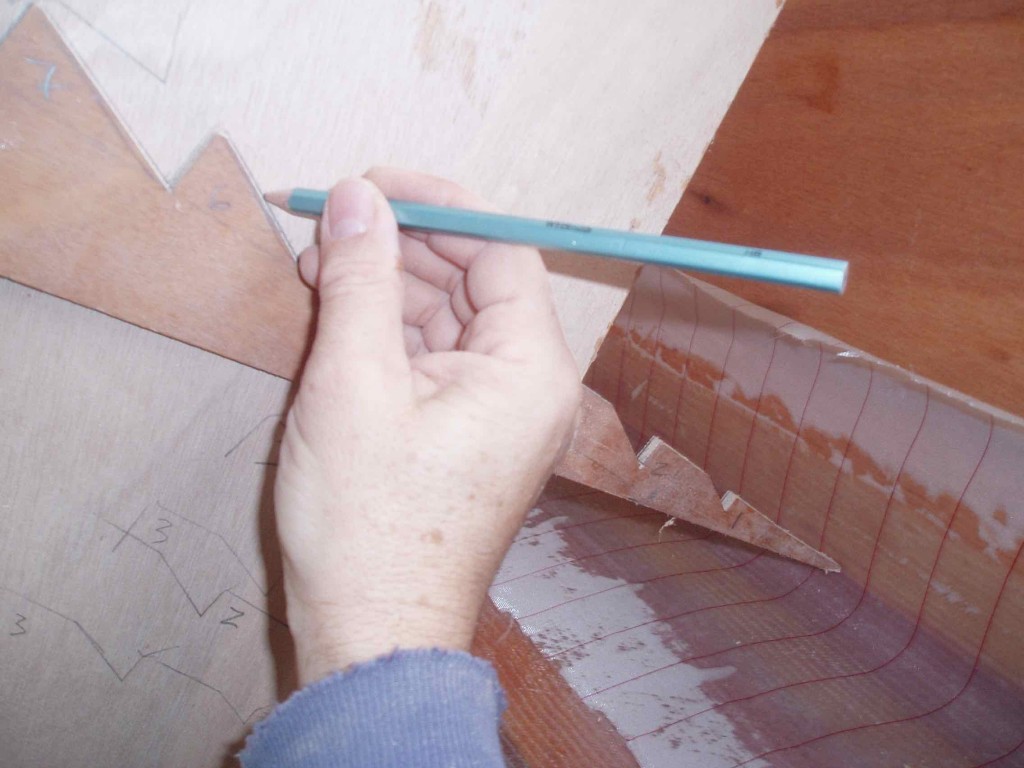
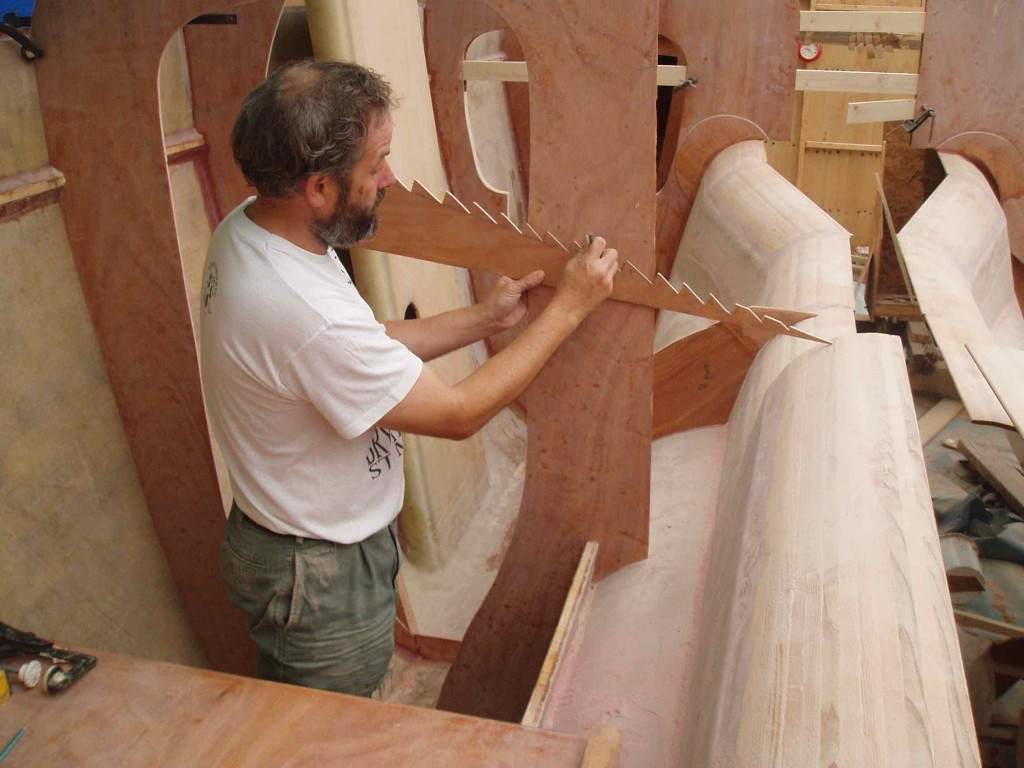
It is always a problem fitting bulkheads into their spaces, but a simple joggle stick makes light work. This is just a long triangle of scrap ply with numbered teeth. A board of scrap timber is wedged in place in the same plane as the required bulkhead. The joggle stick’s point is then placed several times against the required perimeter of the bulkhead and a pencil marks the profile of the teeth on the board. By marking the number of the relevant tooth on the board, it is an easy job to lay the board and joggle stick on the ply to be cut out for the bulkhead and line up where the edges come to. It really is easier to do than to describe! The pictures show how.
Measuring big things
It has come as a surprise to me that measuring a hull is so tricky. Partly this is due to the boat not having a building frame, and partly it is due to simple physics. Tape measures sag, hulls move out of alignment, we are working on a floor that is not level, or something is in the way. The hulls are supposed to be the same size because of the deck flange, but one of them has become ever so slightly wider. Using a laser level meant that I marked one of the side extensions slightly low – you would think it would be more accurate, but I just didn’t query the positions as I had with the water level. Fortunately it is under the bridgedeck, so will be invisible. What is the tolerance for something 10m long? 10mm? That’s 0.1%. Perhaps I just want to get everything spot on, and blame myself when it isn’t. My most loyal ally was the story-stick, mentioned before. With the positions of the bulkheads marked on it, it cannot be wrong when transferred from one hull to the other.
Safety
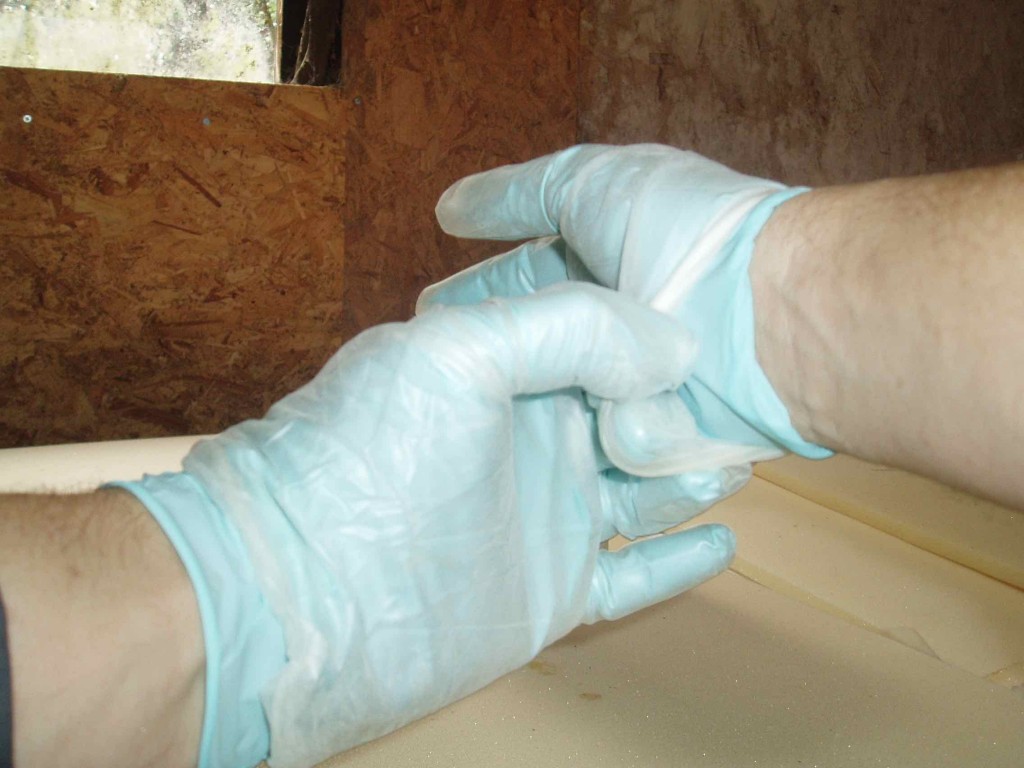
Much has been made about the toxic nature of epoxy, especially the hardener, and we treat it with the greatest respect. For large glue-ups we always use barrier cream then a pair of nitrile disposable gloves and on top of them a pair of vinyl. The advantage of this system is that when your hands are covered in glue, all you have to do is strip off the top layer to have a clean pair. We also use disposable Tyvek suits, plastic aprons and sleeves where necessary: these do not so much protect as just keep the drips off. When handling hardener we discard the gloves as soon as they become contaminated. If we do get a spill on skin, we remove it as soon as possible with West removing cream, which is a gritty compound. Touch wood, we have had no problems so far, but we are not complacent by any means.
Timescale
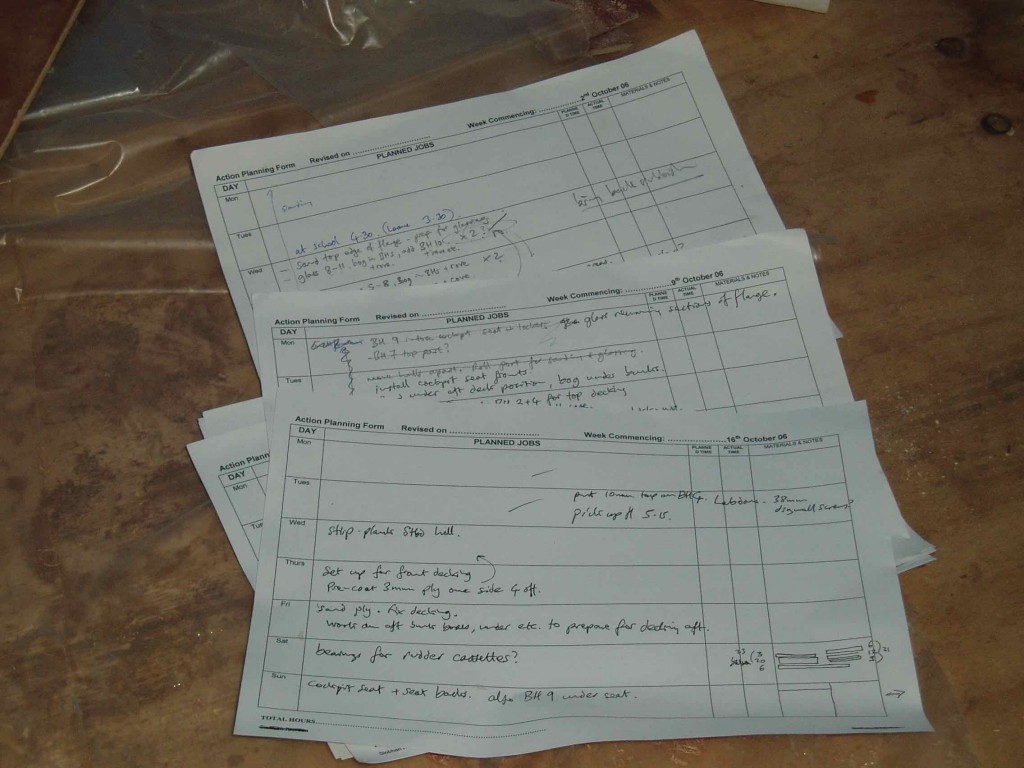
Planning a big job like this is difficult enough when you are familiar with what needs to be done. But when it is your first time, it becomes almost impossible. I started the build with the designer’s words of optimism ringing in my ears, and rapidly became despondent when it was clear that we simply could not keep up with his schedule. Both hulls were supposed to be complete by the end of the summer, and we had only got the second hull to shell stage by Christmas. I had to keep some sort of grip on what was happening, if only because of the logistics of ordering materials so they were available when we needed them. My answer is a weekly action plan, a simple document that enables me to think through the steps of any process, and to plan at least a few weeks ahead. I generally fill them in 4 weeks in advance, but change them frequently, pushing back the tasks as others take longer than expected. After more than a year of building I am still unable to predict the time a task will take, and we have frequent discussions on whether this or that job should be tackled next. But I am much calmer about it now; it will be done when it is done. Better a good job than a quick one. Undertaking a project like this is a big leap, and I have to be careful to guard against feeling overwhelmed by it. The weekly action plans focus the mind on the small jobs, and help to keep up morale.
Ordering materials has become much easier, and I now always have enough in stock for the immediate job in hand.
The dreaded budget
Because the build has, so far, taken much longer than anticipated, the bill for labour has been very high. It is over £12,000 and rising, although more slowly now the hulls are done. I had budgeted a total of £7000. Materials too have worked out much more costly than estimated. This is largely due to the designer not specifying enough in the first place, and my changes to the plans. To be honest I have not kept the budget figures up to date because they are so scary. I don’t think I will grind to a halt for lack of money, but the lesson is that it will cost much more than first thought. My present estimate is that the boat will cost over £50,000 all in, up £15,000 from last year.
One thing I am assiduous about is keeping all receipts. These prove the VAT-paid status of the craft, and would be needed as proof should there be a claim on the insurance.
It was not until well into April that daytime temperatures crawled above 10°C and I was able to begin boatbuilding again in earnest. The time had come to tackle the blisters in the ply laminate…
